Jump to Key Sections
Many users, including myself, have to install multiple operating systems on the same computer where Windows 11 is installed. There can be multiple reasons for this. The program you use runs only on Linux, or you need to test out the performance for one app on different platforms. Irrespective of the reason, if there were multiple operating systems installed on a single Windows 11 computer, you need to be able to view the list of all the operating systems so that you can pick and choose which one to boot into.
In this tutorial we will show you how to enable boot menu in Windows 11 in various ways, along with that we will also discuss a few issues that you may encounter with the Windows 11 boot menu and how to solve those issues.
Method 1: Enable Windows 11 Boot Menu via Advanced System Properties
This is the normal method to enable boot menu in a Windows 11 computer after you have installed multiple operating systems in that computer.
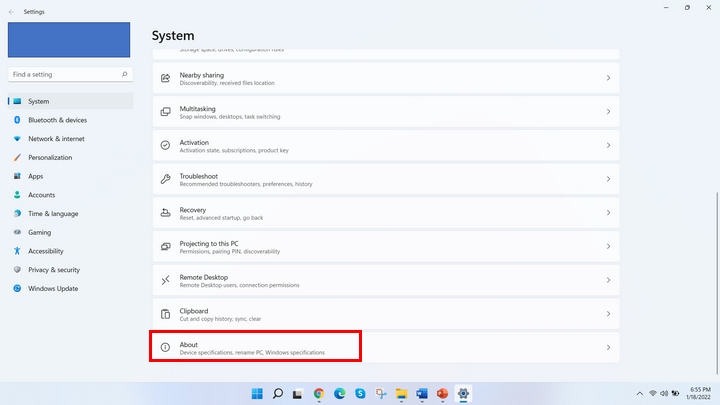
Go to Windows 11 desktop and click on the Windows 11 Start menu to Settings app. Ensure that you are in the System tab from the options on the left side of the window, then scroll down on the right and click on About.
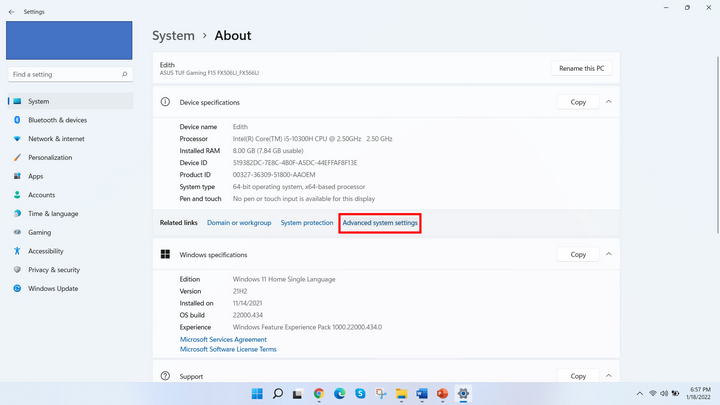
Now you should be able to see detailed information about this Windows 11 computer. Here, you need to click on Advanced system setting.
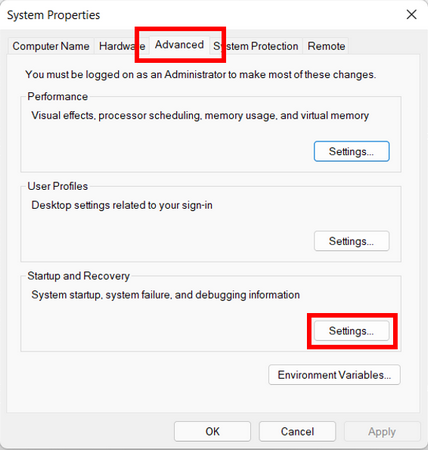
This open sup the System Properties window. In this window, click on Advanced tab at the top, then click on Settings under Startup and Recovery.
Under Startup and Recovery window, navigate to System Startup tab where you will find the option ‘Time to display list of operating systems’. Check this option and set a time in Second to make sure the list of operating systems are displayed for that long.
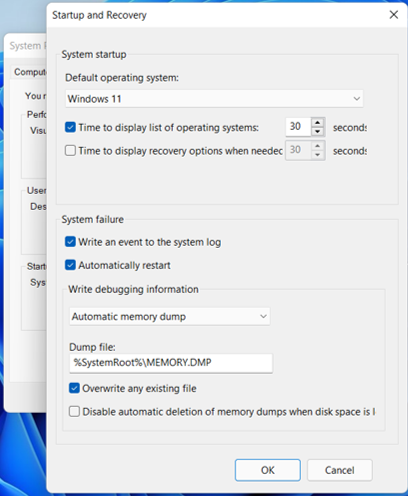
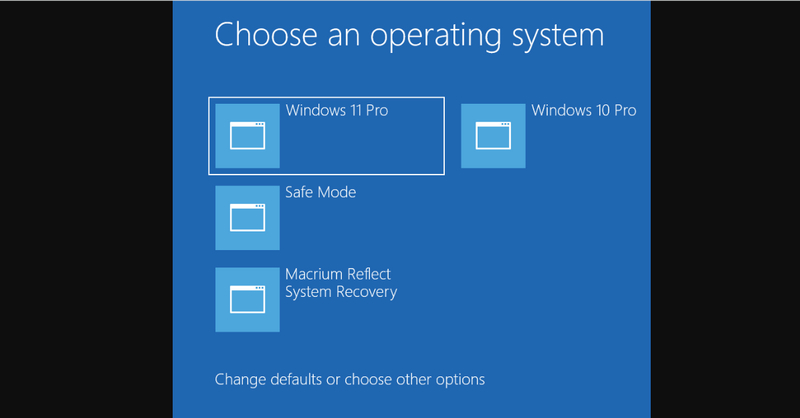
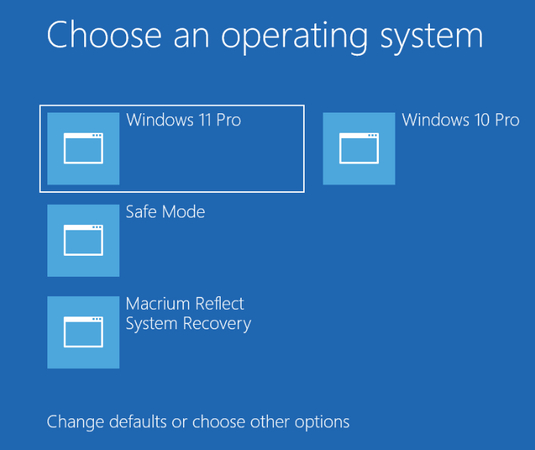
Once done, click on OK to enable the changes and you are good to go. Next time you reboot the Windows 11 computer, you will be able to view the list of operating systems as a menu from which you will be able to choose which OS to boot into.
Method 2: Turn on Windows 11 Boot Menu Using Command Prompt
If you are a tech savvy and more comfortable with Command Prompt, or if for some reason the previous method didn’t work for you, you can follow the below steps to enable boot options in Windows 11. However, I would suggest you to avoid this method if you don’t know anything about Command Prompt.
Just Right-click on Windows 11 Start menu icon, then click on Windows Terminal (Admin).
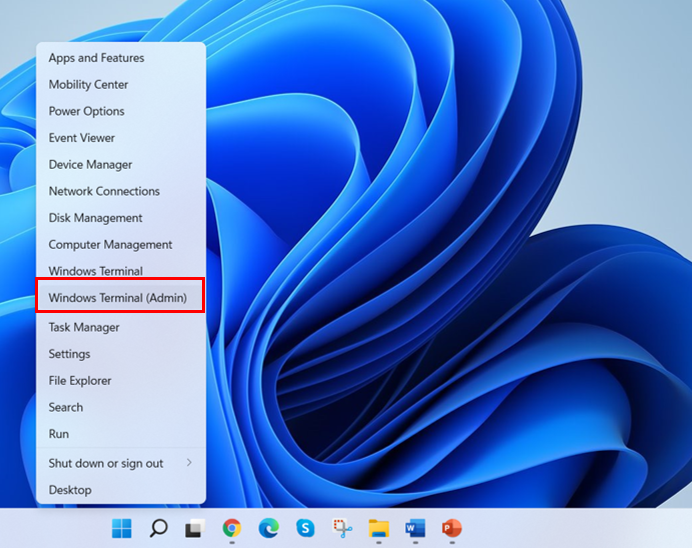
This should open an elevated Windows 11 Terminal window. Type the below command there and press Enter:
bcdedit /set {bootmgr} displaybootmenu yes
That’s it! If you want to disable to boot menu in Windows 11, simply use the same command shown above, but replace the word yes with no in the command.
Method 3: Enable Windows 11 Boot Options with EasyBCD
EasyBCD is a lightweight third-party program that lets you add a boot entry. It is free to use for non-commercial purposes. Here’s how you can use it to show up all operating systems during Windows 11 startup.
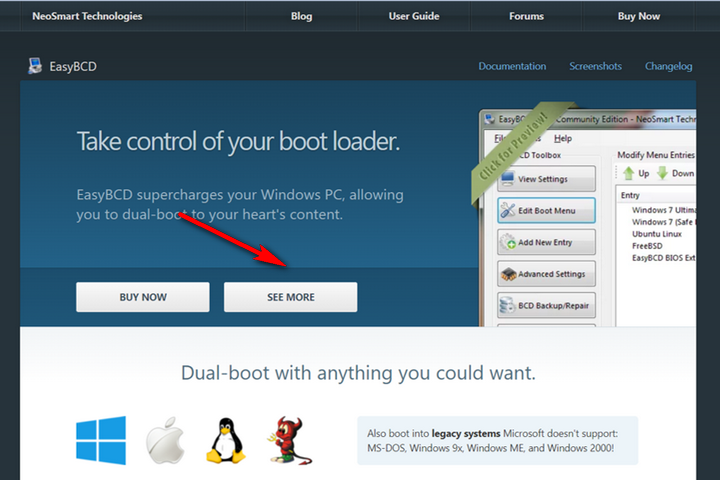
Head over to the EasyBCD page, then click on the See More button. Now, click on Register to download the free edition of EasyBCD.
Once downloaded, install it and launch the program. Click on the Edit Boot Menu button from the left side of the window. In this window, under the Modify Menu Entries section, check the box beside the Operating System which you want to set as default.
Under Menu Options section, check the Use Metro bootloader option and change the Count down from option to set it to 30 seconds.

Next, click Save Settings, then close all the windows, then restart your Windows 11 computer. Now you should be able to see a list of Operating Systems installed in your computer.
Troubleshooting
The most common problem that comes with editing Windows 11 boot menu is not being able to view it. It can be caused by various reasons but the most common reason is Fast Startup. This feature helps you restart Windows 11 computer super fast after the last shutdown. However, when this feature is enabled, Windows 11 locks the installation drive and so, Windows 11 may fail to recognize the Operating System on a multi-boot configured computer. Here is a simple solution to avoid this issue.
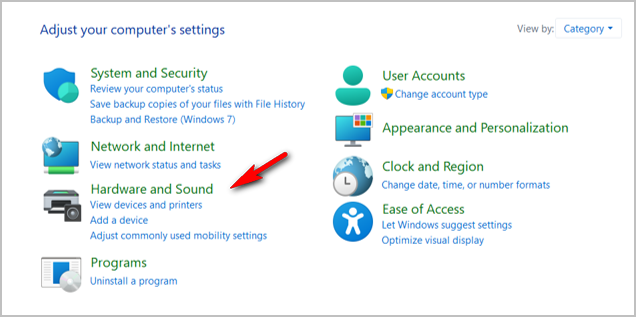
Click on the Windows 11 Search icon and search for Control Panel, then click on Open to launch the Control Panel app. In Control Panel, click on Hardware and Sound.
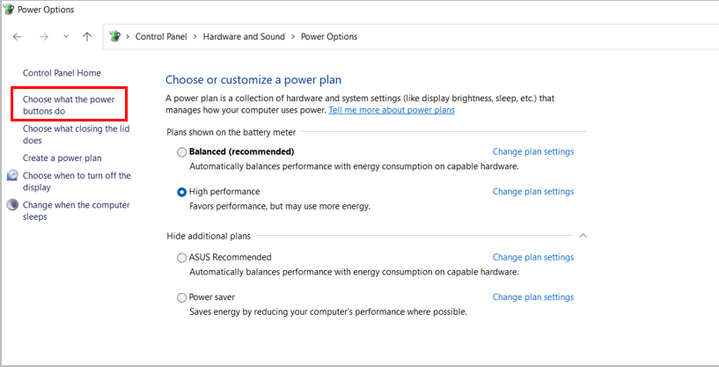
From the new window, click on Choose what the power buttons do from the left side of the window.
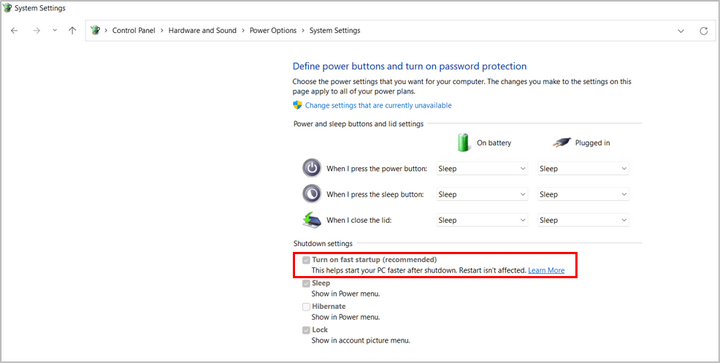
Now click on Change settings that are currently unavailable. Finally, uncheck the option that says Turn on fast startup, click Save Changes, then close all windows and restart your computer to let the changes take effect. That should solve the issue with not being able to view boot menu on Windows 11.
Whether you would like to install Windows 11 with another version of the Windows operating system, or with another operating system like Linux, the best way to enable boot menu in Windows 11 is to use EasyBCD. It is free to use, and does not occupy much space in your computer. However, if you don’t want to use another program, then follow some of the other methods discussed here and you should be able to enable boot menu in Windows 11 computer.