
Jump to Key Sections
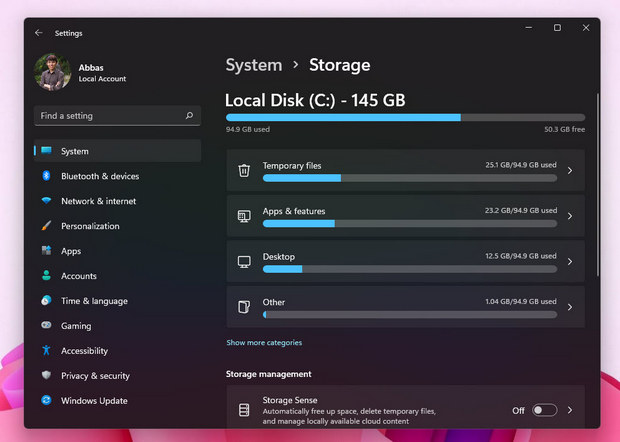
Taking backup of Windows system and files is essential for everyone. On regular basis, you need to back up the computer’s primary storage to another source like an external drive or cloud storage. Making backup means ensuring your data is totally safe in case of data loss.
Moreover, backing up the system can help you restore data in case of system crashes. Suppose you are experimenting with something on your computer and suddenly the computer is down. This is the time when backup comes in handy.
Always try to back up your system and your files on a daily, weekly, or monthly basis. In this post, you are going to learn the step-by-step guide on how to completely back up a Windows 11 PC. First, you are going to learn the types of backups available in windows 11. Then I am going to show you how to create a full system backup in Windows 11. After that, I will guide you through the steps of how to back up your files in Windows 11.
Types of Backups Available in Windows 11
To be exactly clear, there are two types of Backups available in windows 11.
- System Image Backup
- Regular File Backup
System Image Backup
System image backup is a type of backup which is creating an image of operating system, files, folders, software and Windows Settings). In simple words, system image backup is creating a snapshot of the whole operating system and saving it in another location.
Regular File Backup
As the name suggests you can only take back up of your files, not the underlying operating system. Remember if Windows 11 system crashes, then you may have to reinstall windows 11 from scratch. And restore your files from the cloud or an external hard drive.
[Method 1] How to Create a Full System Backup in Windows 11
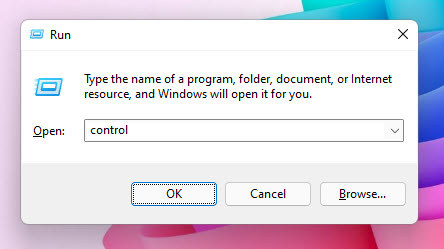
Step #1. Open Control Panel
Press Windows + R on the keyboard to open the run dialog box, type their control, and press enter.
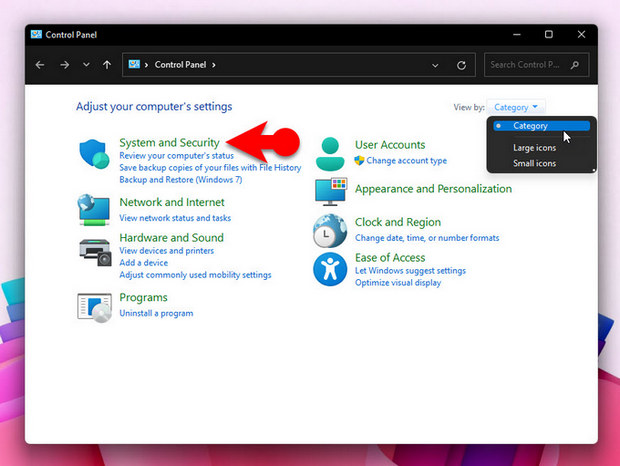
Step #2. Access System and Security
Once the Control panel is opened, make sure the view of the control panel is set to category. After that click on the System and Security.
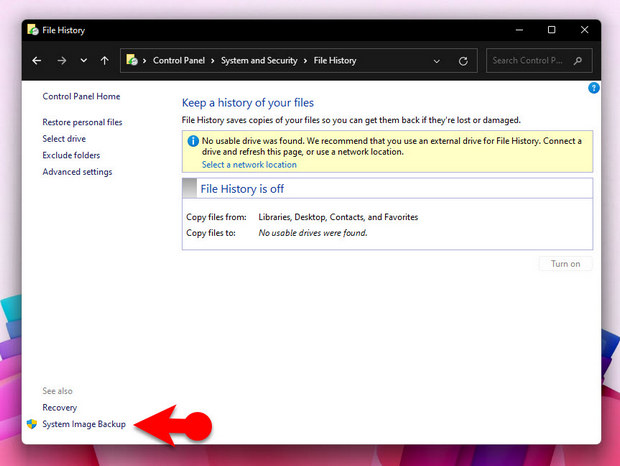
Step #3. Open System Image Backup
Go over the page and click on File History. At the bottom of the File History page, simply click on the System Image Backup.
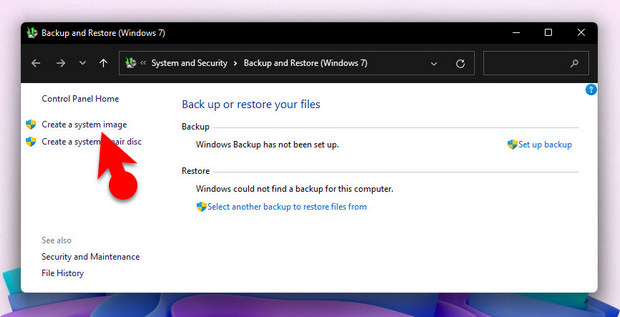
Once you are on the Backup and restore page, on the left panel click on the Create a System Image option.
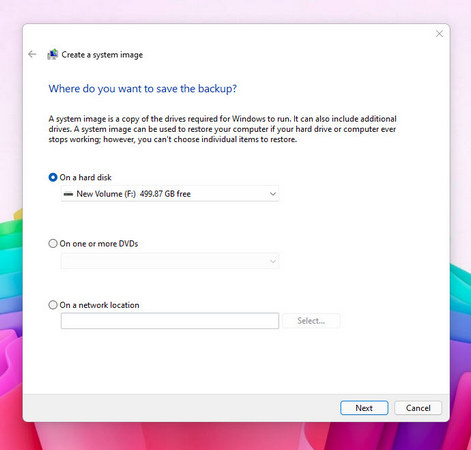
Step #4. Configure Where to Save the Backup
In the previous step the moment you clicked on create a system image, a new window is going to open which is asking you where do you want to save that backup. You have three options to choose from.
- An external hard drive.
- CD or DVD,
- Or choose a drive available on the network.
In my case, I’m going to choose the external hard drive and click next.
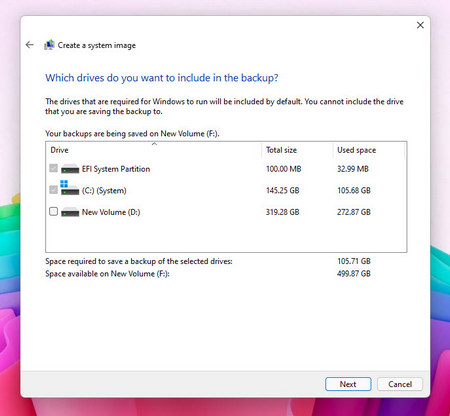
Step #5. Choose Drives to Backup
The system image is specifically created to back up system files, however, if you want to add your drive files too, check the box and click next.
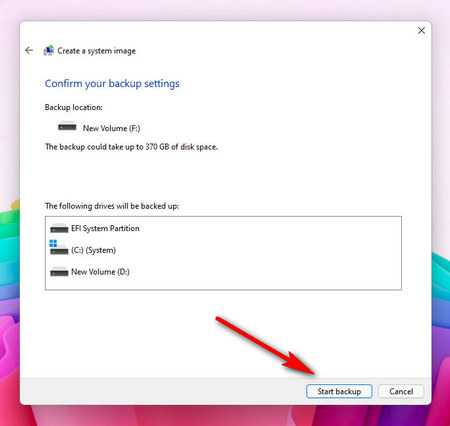
Step #6. Start Backing up Windows 11 PC
Review the settings till now that you have applied, and once you have already click on the start backup. The moment you clicked on Start backup it’s going to take a while to copy all the files from your computer inside the external drive. So, be patient.
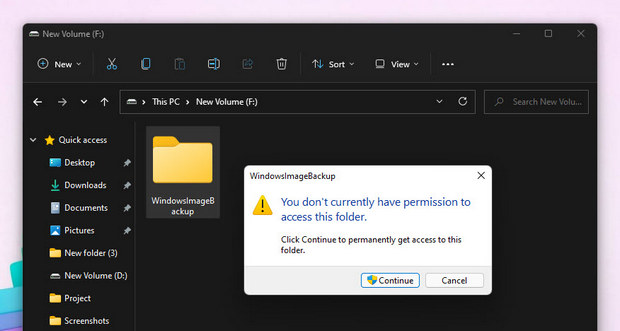
Warning: The moment the backup process has been finished, do not open the windows image backup directory at any cost. If you open it the system image backup will be destroyed, which means it is useless.
[Method 2] How to Backup Files in Windows 11
Now that you have learned how to create a system image backup, it is time for you to learn how to backup personal files in windows 11. Actually, in Windows 11 you can only use two options to only backup your files. The first one is a cloud option and the other one is external drives.
Automatically Backup Files to an External Drive
File history is a very powerful option for taking Backup only for files. The way that File history is working, is simple. Simply it is copying all the files into the external drive without you noticing. All the process is going to be done in the background. So, here are the steps to automatically backup your files to an external drive using the file History.
Step #1. Attach External Drive and Open File History
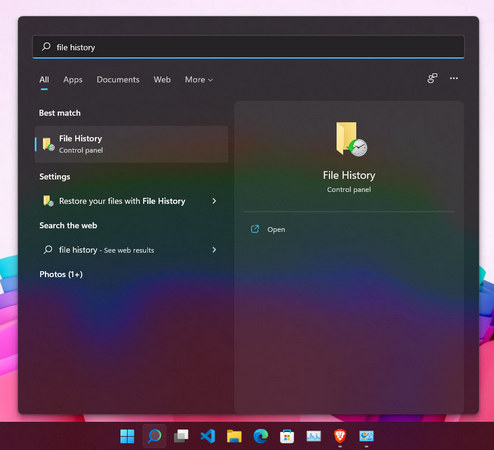
The first step to enable automatic backup of your files to an external drive is to attach your external drive to the computer. The moment you attached the external drive, you have to open file history. The quickest way to open file history is to simply search from the Taskbar.
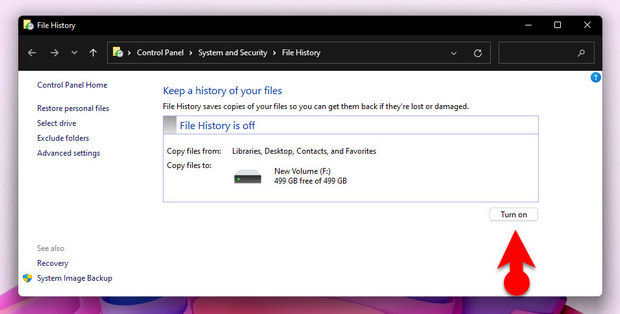
Step #2. Turn on Automatic Backup
The moment the file history is opened, you will see that your External drive is already attached and it is time for you to turn on File History. Click on Turn on and go to your other works.
Step #3. Configure File History Settings
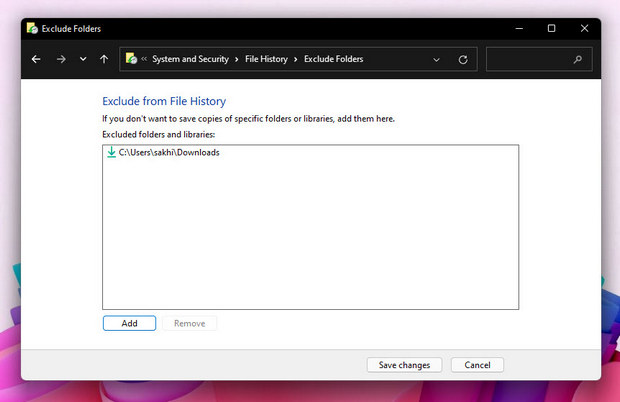
Before turning on the automatic backup using the file history, you need to learn about the settings of the file history. The settings of the file history are located in the left panel. If you want to exclude a file or folder in the Backup, click on the exclude and locate the file or directory.
Step #4. File History Advanced Settings
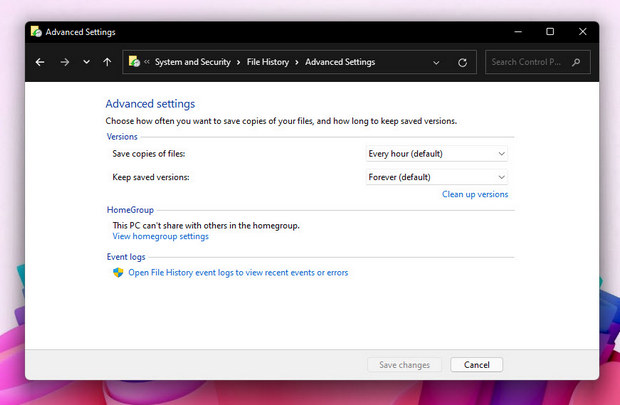
You can also access the advanced settings of file history from the left panel too. In the advanced settings, you can configure the copies of the files’ time and their versions. At the same time, you can also access the file history errors in the windows events and logs.
Here you can see the Backup options of OneDrive and File History.
- Backup Files to OneDrive: Microsoft offers 5 GB free storage for their online cloud storage called OneDrive. 5 GB storage is not a lot for backup of your files. Still, if you have purchased the OneDrive, then go on and Backup your files.
- File History: the other backup option that you will see here is file history. The first step is to add a drive for file history to Back up your files. The moment you added the drive, then you can also check the box known as automatically Backup my files. Every hour file History will Back up your files from the (C:\Users\username) into the external drive. If you want to configure those settings, click on the more options.
[Method 3] Take Full Backup of Windows 11 Using Backup & Restore
The final method that I can recommend for you to take full backup of Windows 11 computer is via the built-in backup and restore feature, which is available since Windows 7.
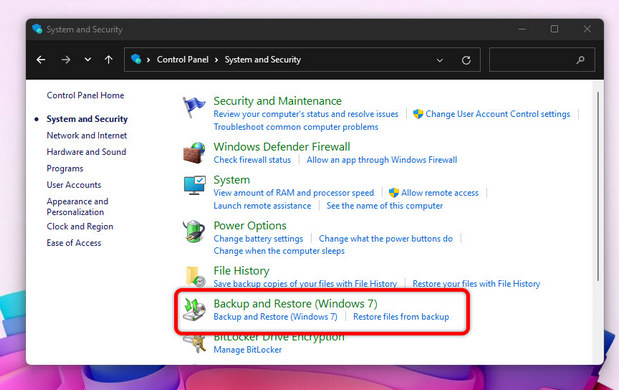
Step #1. Access Backup and Restore
The first step for you is to open backup and restore. You can simply search by clicking on their such icon at the taskbar or open control panel, click on System and Security, and click on Backup and Restore.
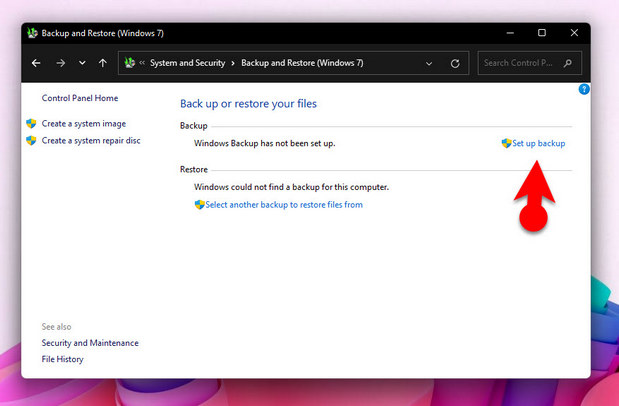
Step #2. Start Creating a Backup for Windows 11
After opening Backup and Restore, attached the external drive to the computer. Now that everything is ready simply click on set up back up.
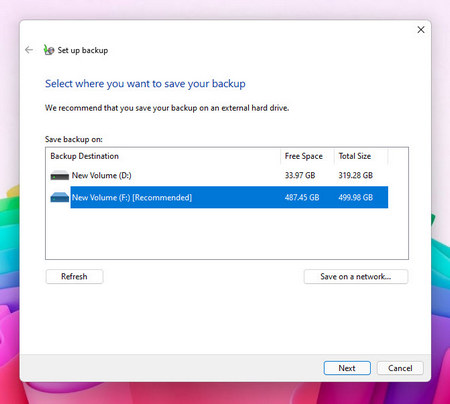
Step #3. Choose External Drive
Here is the step where you have to select your external hard drive and click Next.
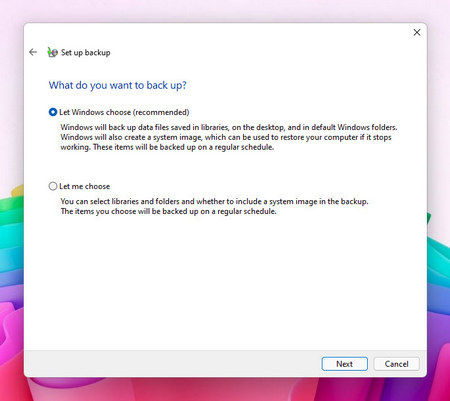
Step #4. What Do You Want to Back up?
You have two options for what do you want to back up for this step. The first option is Windows is recommending to back up all the necessary files that they are recommending. However, you can also choose the other option which is up to you to choose files to backup. For Now, I will select Let Windows Choose (recommended).
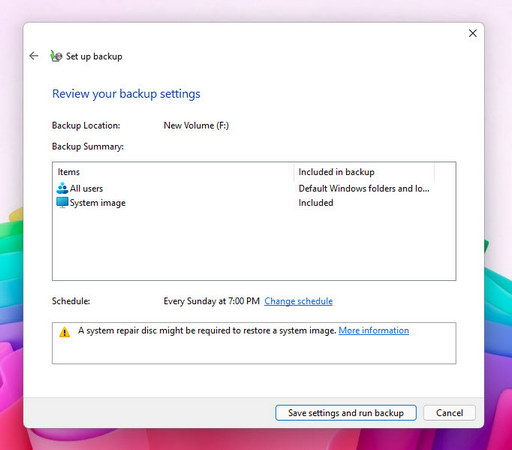
Step #5. Review Settings and Start Backing Windows 11
Review all the settings that you have applied yet and then when you’re ready, click save settings and run back up.
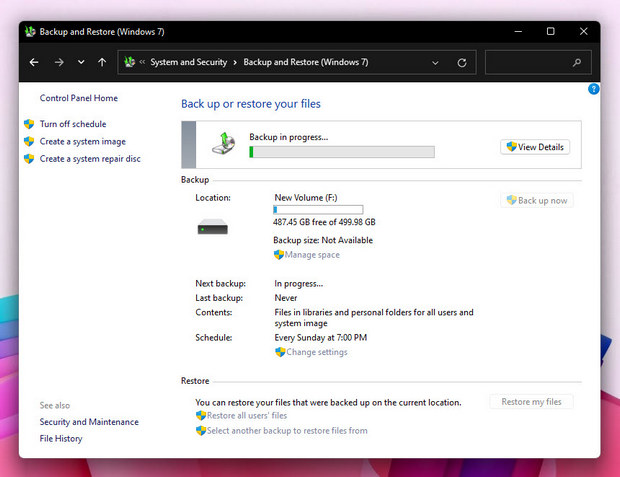
Here is the Backup Process.
Also, on the left panel you can configure other settings regarding true backup and restore. Suppose you can configure the schedule time to back up your files. Or create a system image and finally create a system repair disk.
Summary:
To summarize this post, first you learned the different types of backups available on windows 11. Then we followed through all those steps to create a system image backup and also how to take backup only for your files using the File History and Backup and Restore.
In addition, if you dislike the methods described about, then there are tons of free Windows 11 backup software out there, such as Macrium Reflect Free, Acronis True Image or AOMEI Backupper, which support differential and incremental backup.